
Have you ever felt the thrill of turning your wildest design dreams into reality with Grasshopper Plugin ??
Imagine a world where your creations are not confined by traditional design boundaries, where your designs adapt to changing conditions, optimize themselves, and even surprise you with innovative possibilities.
If you’re an aspiring or seasoned Grasshopper designer, you’re about to embark on an exciting journey through the universe of parametric design. In this blog post, we’ll unveil the limitless potential of Grasshopper, the plugin that empowers you to design beyond limits and foster creativity and innovation in your projects.
Buckle up for an inspiring exploration of Grasshopper’s capabilities, practical tips, and insights that will ignite your passion for parametric design. Let’s dive in!
Getting Started with Grasshopper: Unleash Your Creative Potential
Welcome, Grasshopper enthusiasts! If you’re reading this, you’ve embarked on an exciting journey into the world of parametric design. Grasshopper for Rhino is a game-changer in the realm of design, enabling you to create intricate, innovative, and mind-boggling structures that were once only dreams. In this guide, we’ll dive deep into the basics of Grasshopper, making sure you’re well-prepared to let your creativity run wild. So, let’s get started!
What is Grasshopper for Rhino?
Grasshopper is like the magician’s wand in the world of 3D modeling and design. At its core, it’s a visual programming language and environment that integrates seamlessly with Rhino 3D. While Rhino provides a robust platform for 3D modeling, Grasshopper takes it up a notch by introducing parametric capabilities. Parametric design allows you to create designs that are driven by parameters and relationships, making it incredibly powerful for generating complex, adaptive structures.
Think of Grasshopper as your digital design assistant, helping you explore and manipulate your 3D models with ease. Instead of using traditional CAD methods that rely heavily on manual adjustments, Grasshopper lets you define rules and algorithms that govern your design, giving you unparalleled control and flexibility.
Historical Context
To truly appreciate Grasshopper’s significance, let’s rewind a bit. Grasshopper was first developed by David Rutten as a project at Robert McNeel & Associates (the creators of Rhino) around 2007. It quickly gained popularity among architects, engineers, and designers due to its groundbreaking approach to parametric design.
Over the years, Grasshopper has evolved into a vital tool for those in the design field. Its community has grown exponentially, contributing to its continuous development and the creation of countless plugins and extensions that further enhance its capabilities.
Grasshopper’s Role in Rhino 7
With the release of Rhino 7, Grasshopper has become an integral part of the Rhino ecosystem. Rhino 7 introduces significant improvements in terms of compatibility and integration, making it easier than ever to harness the power of Grasshopper.
One of the standout features is the enhanced ability to work seamlessly between Rhino and Grasshopper. This means you can effortlessly transfer data, geometry, and parameters back and forth, allowing for a more fluid and efficient design process. Plus, with Rhino 7’s improved display and visualization capabilities, your Grasshopper designs will look even more stunning.
Installing and Setting Up Grasshopper
Getting your hands on Grasshopper is a breeze. It comes bundled with Rhino 7, so if you already have Rhino installed, you’re halfway there. Simply launch Rhino 7, and you’ll find Grasshopper under the “Extensions” menu.
If you’re starting from scratch, you can download a free evaluation version of Rhino 7, which includes Grasshopper. After the installation process is complete, you’ll be ready to embark on your Grasshopper journey.
Interface Overview
Once you’ve got Grasshopper up and running, let’s take a quick tour of its interface. Don’t worry; it’s not as intimidating as it may seem at first glance.
The Grasshopper interface consists of three main areas:
- Canvas: This is your design workspace, where you’ll create, connect, and manipulate components to build your parametric models.
- Palette: On the left side of the screen, you’ll find a palette of components. Think of these as your building blocks. You’ll drag and drop components onto the canvas and connect them to create your design.
- Parameters and Properties: On the right side, you’ll see panels for setting parameters and properties. These panels allow you to define values and fine-tune your design.
Grasshopper vs. Traditional CAD Design
Now that we’ve covered the basics, let’s address a common question: “Why should I use Grasshopper when I already have experience with traditional CAD design?”
Key Differences and Advantages
- Parametric Flexibility: Grasshopper’s parametric nature is its superpower. In traditional CAD, making design changes often means laboriously editing individual elements. In Grasshopper, you change parameters, and the entire design updates automatically. This flexibility allows for rapid exploration of design alternatives.
- Generative Design: Grasshopper can generate designs based on algorithms and rules. This is particularly valuable for creating organic shapes, patterns, and structures that would be exceedingly challenging to create manually in traditional CAD.
- Complex Geometry: Grasshopper excels in handling complex geometries. Whether you’re designing intricate facades, custom furniture, or avant-garde sculptures, Grasshopper’s algorithms can handle the complexity with ease.
- Scripting and Customization: For those who like to get under the hood, Grasshopper offers scripting capabilities. This allows you to create custom components and automate repetitive tasks, further streamlining your workflow.
- Interdisciplinary Collaboration: Grasshopper is a versatile tool that transcends traditional design boundaries. It’s equally useful for architects, engineers, product designers, and artists. This interdisciplinary approach fosters collaboration and innovation.
In essence, Grasshopper empowers you to push the boundaries of your creativity and design capabilities. While traditional CAD will always have its place, Grasshopper’s parametric design philosophy opens up a new world of possibilities.
The Easy Way to Learn Grasshopper!
If you want to learn more about Grasshopper and be a professional grasshopper designer, we strongly recommend joining THE BEST Grasshopper Course for Beginners here!
Grasshopper Basics: Unleashing Your Creative Potential
Hey there, Grasshopper enthusiasts! By now, you’ve dipped your toes into the fascinating world of Grasshopper and are ready to take your skills to the next level. In this guide, we’re going to dive headfirst into the fundamentals of Grasshopper. Don’t worry; we’ll keep it fun and engaging as we explore components, parameters, scripting, and the building blocks of Grasshopper design.
Grasshopper Components and Parameters
Let’s start with the nuts and bolts of Grasshopper—components and parameters.
Components are the heart and soul of Grasshopper. Think of them as the Lego bricks that you’ll use to build your parametric designs. Each component serves a specific function, such as creating geometry, performing mathematical operations, or controlling data flow.
Now, let’s talk about parameters. Parameters are like the dials and sliders on your creative control panel. They allow you to set values, adjust parameters, and interact with your Grasshopper components in real-time. Parameters come in various flavors, including numbers, sliders, curves, and more, depending on what you need for your design.
To connect components and parameters, simply drag a wire from the output of one component to the input of another. This wire carries data from one element to another, allowing you to create dynamic relationships within your design.

Creating Your First Grasshopper Script
Time to get your hands dirty! Let’s create your very first Grasshopper script. We’ll start with something simple to ease you in.
- Open Grasshopper: Launch Grasshopper from within Rhino 7.
- Components Palette: On the left side, you’ll find the components palette. Let’s start with a basic one: the “Point” component. Drag and drop it onto the canvas.
- Canvas: The canvas is your workspace. Place the point component anywhere on the canvas.
- Parameters: Now, we need to specify the location of this point. For that, we need a parameter. In the parameters tab, look for the “Point Parameter” and drag it onto the canvas.
- Connect the Dots: Here comes the fun part! Connect the output of the Point Parameter to the input of the Point component. You’ll see a wire connecting them.
- Set the Location: Double-click on the Point Parameter. A dialog box will appear. Here, you can set the X, Y, and Z coordinates of your point. Play around with these values and watch how the point on the canvas moves in real-time.
You’ve just created a simple Grasshopper script that controls a point’s position using parameters. This may seem basic, but it’s the foundation of more complex designs.
Understanding Data Flow in Grasshopper
In Grasshopper, data flows like a river through your design. Understanding this flow is crucial for creating parametric models. Let’s break it down:
- Data Types: Data in Grasshopper can be numbers, points, curves, surfaces, and more. Each component has specific data types it can accept and produce. Pay attention to data types when connecting components.
- Data Trees: Data can be organized into data trees. Imagine it as a hierarchical structure. For instance, a list of points could be organized into branches, each containing several points. Data trees help manage complex information flows.
- Parameter Inputs and Outputs: Parameters are the bridges that allow you to control and manipulate data. When you connect a parameter to a component’s input, you’re providing the data that the component needs to perform its function.
- Data Flow Direction: Data flows from left to right and top to bottom on the Grasshopper canvas. Components on the left receive data, process it, and pass it to components on the right. Keep this in mind when arranging your script.
- Data Transformation: Components can transform, manipulate, or filter data as it flows through them. This allows you to create complex designs by combining simple operations.
Grasshopper Scripting vs. Visual Programming
Up until now, we’ve focused on Grasshopper’s visual programming, which involves connecting components on the canvas to create parametric designs. However, there’s more to Grasshopper than meets the eye.
Grasshopper Scripting: For those who crave more control and customization, Grasshopper offers scripting capabilities. This means you can write custom scripts in languages like C# or Python to perform advanced operations that might not be achievable with standard components.
While scripting opens up endless possibilities, it’s important to note that visual programming is the ideal starting point for beginners. As you gain confidence and expertise, you can gradually dive into scripting to tackle complex design challenges.
Building Blocks of Grasshopper Design
Now, let’s explore the essential building blocks of Grasshopper design. These are the elements that lay the foundation for your parametric creations.
1. Points, Lines, and Curves
- Points: The most fundamental building block in Grasshopper. They represent specific locations in 3D space and can be manipulated in countless ways.
- Lines: Connect points to create lines. Lines can be straight or curved, and you can control their length, direction, and curvature.
- Curves: Curves are more flexible than lines and can take on various shapes. Bezier curves, splines, and arcs are just a few examples. Curves are crucial for creating organic and complex geometries.
2. Surfaces and Solids
- Surfaces: Surfaces are like the skin of your 3D model. They can be flat or curved and serve as the basis for creating 3D objects. From lofting to extruding, there are various methods for generating surfaces in Grasshopper.
- Solids: Solids are 3D shapes that enclose a volume. Think of cubes, spheres, or complex architectural forms. You can create solids by combining surfaces or using specialized components.
3. Mathematical Operations
- Math Components: Grasshopper is equipped with a wide range of mathematical operations. You can perform basic arithmetic, trigonometry, geometry, and more. These operations allow you to manipulate data and create parametric relationships.
- Formulas: For advanced users, you can use scripting to write custom mathematical formulas. This level of control can be invaluable when tackling intricate design challenges.
These building blocks are the raw materials of your Grasshopper designs. By combining them, adjusting parameters, and controlling data flow, you can craft parametric models that range from architectural wonders to artistic masterpieces.
Grasshopper Parametric Modeling: Your Design Superpowers
Hey there, fellow Grasshopper designers! If you’re ready to take your skills up a notch and delve into the captivating world of parametric modeling, you’ve come to the right place. In this guide, we’ll explore the ins and outs of parametric design, how Grasshopper plays a pivotal role, and some awe-inspiring case studies from the fields of architecture, product design, and engineering. Plus, we’ll share some juicy parametric modeling best practices to supercharge your creations. So, let’s dive in!
Introduction to Parametric Design
Parametric design is like the magic wand of the design world. It’s a creative approach that lets you create complex, adaptive, and highly customizable designs by defining parameters and relationships. Instead of manually tweaking every aspect of a design, you set rules and constraints that drive your creation. This way, you can explore multiple design iterations and variations effortlessly.
Parametric design isn’t confined to one industry—it’s a versatile tool used in architecture, product design, engineering, art, and more. It’s all about harnessing the power of algorithms to achieve innovative and efficient solutions.
How Grasshopper Facilitates Parametric Modeling?
Now, let’s talk about the superstar of the show—Grasshopper. Grasshopper is your trusty sidekick in the world of parametric modeling. Here’s how it makes parametric design a breeze:
- Visual Programming: Grasshopper uses a visual programming approach. Instead of writing code, you connect components on a canvas. Each component represents a function, operation, or piece of data. By connecting them, you create a dynamic network of relationships.
- Real-Time Feedback: Grasshopper provides real-time feedback. As you adjust parameters, you see your design change instantly. This instant gratification allows for rapid exploration of design possibilities.
- Data Flow: Grasshopper manages data flow seamlessly. Components send and receive data, and you can control how data propagates through your design. This helps create intricate parametric relationships.
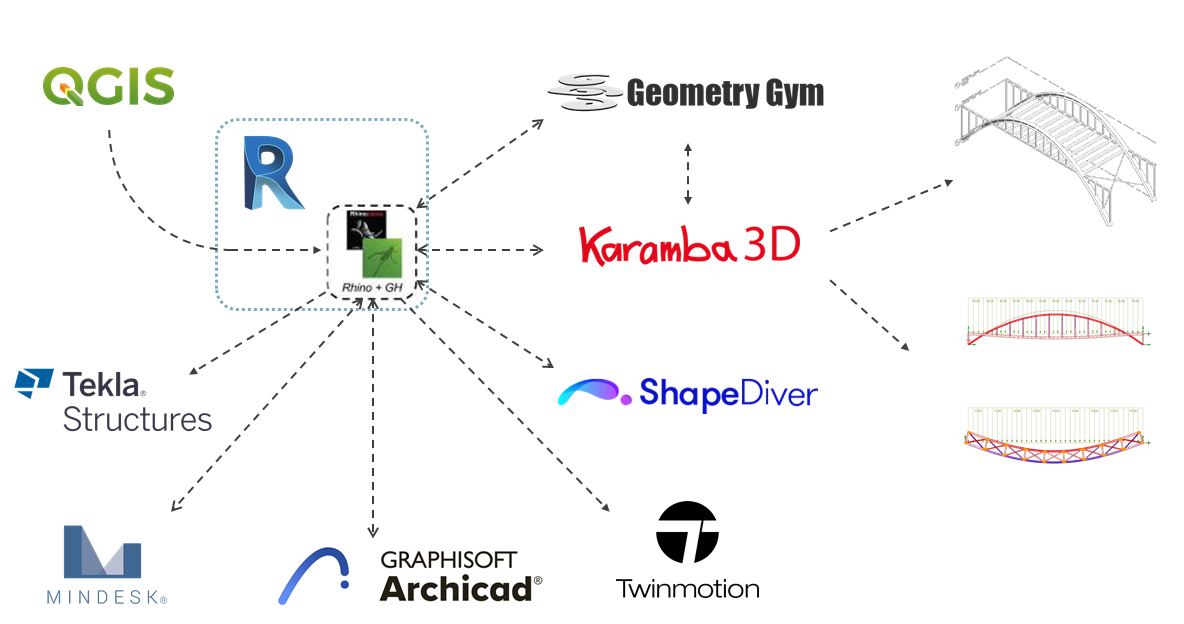
- Integration with Rhino: Grasshopper integrates seamlessly with Rhino 3D. You can use Rhino to create complex 3D geometry and then use Grasshopper to parametrically manipulate and refine it. It’s a match made in design heaven.
Case Studies of Parametric Design
Architecture: The Eden Project
Imagine creating a sustainable, biomes-inspired architectural wonder. The Eden Project in Cornwall, UK, is a perfect example of parametric design in action. Giant geodesic domes house different climate zones, allowing diverse plants to thrive. Parametric modeling was used to optimize the shape of these iconic structures, taking into account factors like solar exposure and structural stability.
Product Design: Nike’s Flyknit Shoes
Nike’s Flyknit shoes are a prime example of parametric design in the world of footwear. Parametric algorithms were used to design a lightweight, high-performance shoe that adapts to the shape of the wearer’s foot. By optimizing the placement of yarn and materials, Nike achieved a revolutionary product that blends comfort and performance seamlessly.
Engineering: The Millau Viaduct
The Millau Viaduct in France is an engineering marvel. Parametric design played a crucial role in optimizing the viaduct’s structural components. Algorithms were used to determine the precise shape and size of each component, resulting in a stunning yet efficient bridge that spans the Tarn River Gorge.

Parametric Modeling Best Practices
1. Optimization
Parametric design is all about finding the sweet spot where form meets function. To optimize your designs:
- Define Clear Objectives: Start with a clear understanding of your design goals. What are you trying to achieve? What parameters will you manipulate to reach those goals?
- Iterate and Refine: Don’t settle for your first design iteration. Explore different possibilities by tweaking parameters and observing how they affect the outcome. Grasshopper’s real-time feedback is your ally here.
- Analyze Performance: Use parametric modeling to assess how your design performs under various conditions. Whether it’s structural stability, energy efficiency, or aesthetics, optimize based on data and analysis.
2. Iteration
Iteration is at the heart of parametric design. It allows you to refine your designs and discover new possibilities:
- Feedback Loop: Embrace the iterative process. Continuously adjust parameters, observe results, and make refinements. Each iteration brings you closer to the ideal solution.
- Variation: Don’t be afraid to introduce randomness or variation into your designs. This can lead to unexpected and creative outcomes that you might not have considered otherwise.
- Document and Compare: Keep a record of each iteration. Document the parameters and outcomes. This helps you track your progress and make informed decisions.
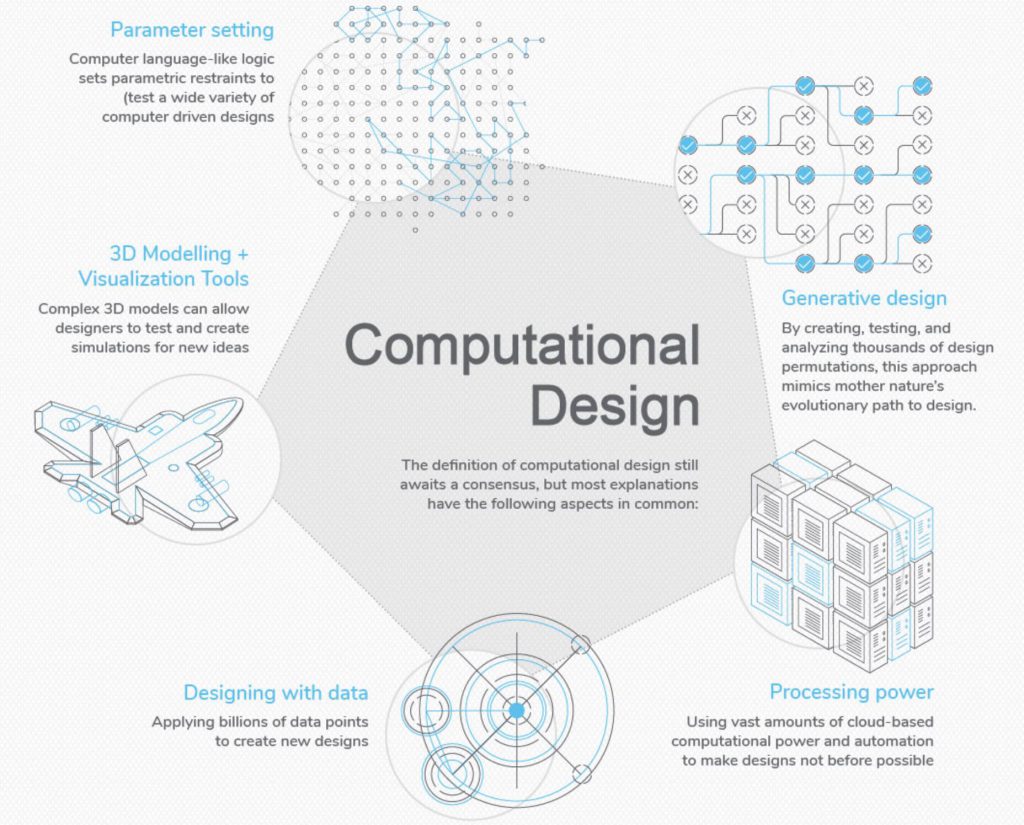
3. Generative Design
Generative design takes parametric modeling to the next level. It’s all about using algorithms to generate designs based on predefined constraints:
- Set Constraints: Define your design constraints, such as material properties, budget, or performance requirements.
- Let Algorithms Create: Allow generative algorithms to explore countless design possibilities within your constraints. This often results in solutions that are more efficient and innovative than human-generated designs.
- Evaluate and Refine: Once the generative process is complete, evaluate the generated designs based on your criteria. Select the most suitable options and refine them further.

Design Like A Pro on Grasshopper Course!
From basics to advanced techniques, we’ll guide you in creating mind-blowing parametric designs effortlessly.
Mastering the Rhino-Grasshopper Workflow: Design Like a Pro
Hey, Grasshopper designers! Ready to take your skills to the next level? Great, because in this guide, we’re going to talk about the seamless integration of Grasshopper into Rhino. We’ll explore how to integrate them, import/export data between the two, and even peek into some real-world applications. Plus, we’ve got a bag of tips to make your Rhino-Grasshopper workflow as smooth as butter. Let’s dive right in!
Integrating Grasshopper into Rhino
First things first—getting Grasshopper to cozy up with Rhino.
- Launch Rhino: Fire up Rhino 7, your trusty 3D modeling platform. You’ll need Rhino to serve as the canvas for your Grasshopper creations.
- Access Grasshopper: Go to the “Extensions” menu within Rhino, and you’ll find the beloved Grasshopper listed there. Click on it to launch the Grasshopper interface. Voilà! You’ve just integrated Grasshopper into Rhino.
Now that you’ve got both tools at your disposal, let’s explore how they can work together seamlessly.
Importing and Exporting Data Between Rhino and Grasshopper
Your designs often require data to flow freely between Rhino and Grasshopper. Here’s how you can make that happen:
- Geometry Exchange: One of the most common tasks is sending 3D geometry between the two programs. In Grasshopper, you can use the “Rhino” components to reference Rhino geometry. Conversely, you can use the “Bake” component to send Grasshopper-generated geometry back to Rhino.
- Data Containers: Use data containers like lists, trees, and data trees to organize and manage your data. Grasshopper has components for creating, accessing, and manipulating data containers, making it easy to work with complex data structures.
- Parameter and Slider Interactions: Rhino’s parameters and sliders can be linked directly to Grasshopper. This means you can adjust Rhino parameters, and Grasshopper will respond in real-time. It’s like a dynamic dance between the two programs.
- CSV Files and Excel: You can also import data from CSV files or Excel spreadsheets into Grasshopper. This is handy when you need to use external data to drive your parametric designs.
Now that you’ve got the hang of data flow, let’s see how this integration plays out in the real world.
Real-World Applications and Projects
Let’s take a peek into some fascinating real-world projects where the Rhino-Grasshopper workflow shines bright:
Architecture: The Gherkin Tower
The iconic Gherkin Tower in London is a masterpiece of parametric design. Its distinctive shape and energy-efficient features were achieved through the collaboration of architects, engineers, and designers using Rhino and Grasshopper. Parametric modeling allowed for the optimization of the tower’s unique form while maximizing natural light and ventilation.
Product Design: 3D-Printed Furniture
Imagine designing and manufacturing furniture that’s not just stylish but also customized for each user. That’s what some innovative designers are doing with Rhino and Grasshopper. They create generative algorithms that generate unique furniture designs based on user preferences and then 3D-print the pieces. It’s the future of personalized interior design.
Engineering: Complex Structures
In engineering, the Rhino-Grasshopper duo is used to optimize the design of complex structures like bridges and stadiums. Engineers can simulate various load conditions, structural configurations, and material properties, enabling them to create safer and more efficient structures.
Art and Sculpture: Interactive Installations
Artists are using the Rhino-Grasshopper combination to create interactive and kinetic art installations. These installations respond to environmental factors like wind, light, and temperature, blurring the line between art and science.
Tips for a Seamless Rhino-Grasshopper Workflow
The integration is in place, the data is flowing, and you’ve seen what’s possible in the real world. Now, let’s talk about some tips to make your Rhino-Grasshopper workflow even smoother:
- Stay Organized: Keep your Grasshopper scripts tidy and well-organized. Use groups, colors, and labels to make it easier to navigate complex designs.
- Modularity: Break down your Grasshopper scripts into modular components. This makes it easier to debug, update, and reuse parts of your design in other projects.
- Annotations and Comments: Add comments and annotations to your Grasshopper components to explain their functionality. This will save you time when revisiting old scripts or sharing them with colleagues.
- Parameter Naming: Give your parameters meaningful names. This not only makes your script more readable but also helps you understand the purpose of each parameter at a glance.
- Data Trees: Understand how data trees work in Grasshopper. They can be powerful for organizing and managing complex data, but they can also be tricky to grasp initially.
- Plugin Management: Keep your Grasshopper plugins up to date. Plugin updates often bring bug fixes and new features, which can enhance your workflow.
- Back-Up Your Work: Like any digital work, backup your Grasshopper scripts and Rhino files regularly. You never know when you might need to revisit an old project.
- Community and Learning: Join the Grasshopper community. There are forums, tutorials, and online courses that can help you expand your skills and solve design challenges.
- Scripting: As you become more proficient, consider exploring Grasshopper’s scripting capabilities. Custom scripts can add a new layer of functionality to your designs.
- Have Fun: Lastly, don’t forget to have fun with your designs. Parametric modeling can open up a world of creativity, so don’t be afraid to push the boundaries of what’s possible.
Mastering Advanced Grasshopper Techniques: Unleash Your Design Potential
Hello, fellow Grasshopper designers! If you’re ready to take your skills to the next level and dive deep into the world of advanced Grasshopper techniques, you’re in for a treat. In this guide, we’ll explore custom components and scripting, tackle the challenges of parametric design with complex geometries, dive into data visualization, and even explore the exciting realm of parametric design in manufacturing and 3D printing. So, let’s roll up our sleeves and get started!
Custom Components and Scripting in Grasshopper
One of the hallmarks of advanced Grasshopper usage is the ability to create custom components and leverage scripting to automate tasks and unlock new design possibilities. Let’s break it down:
- Custom Components: Grasshopper allows you to design your own components. These custom components can encapsulate complex operations or algorithms, making your designs more modular and easier to manage. Whether it’s a unique form-finding algorithm or a specialized geometry generator, custom components give you unparalleled flexibility.
- Scripting Power: For those who want complete control, Grasshopper supports scripting in languages like C# and Python. This opens up a world of possibilities. You can write scripts to manipulate data, create custom algorithms, and interact with external software and data sources.
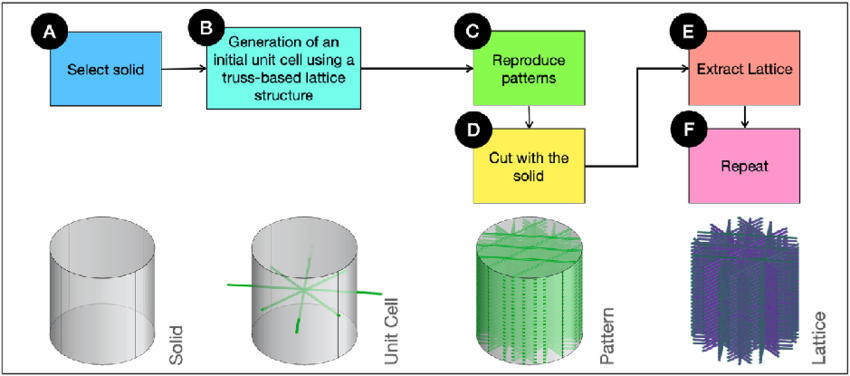
- Automation: Scripting can help automate repetitive tasks. For instance, you can create a script that generates complex lattice structures for architectural designs with a single click. This not only saves time but also ensures consistency in your work.
- Plug-ins: Grasshopper has a vibrant plug-in ecosystem. You can extend its capabilities by installing and creating plug-ins. These plug-ins can add new components, features, and integrations, further enhancing your design toolkit.
Now that we’ve touched on the power of custom components and scripting, let’s move on to the next frontier of parametric design.
Parametric Design with Complex Geometries
Designing with complex geometries is where Grasshopper truly shines. It allows you to create intricate, organic forms that would be incredibly challenging with traditional methods. Here’s how to tackle the complexities:
- Advanced Modeling Techniques: Master advanced modeling techniques like lofting, sweeping, and network surfaces. These tools can help you generate complex surfaces and solids, perfect for sculptural designs and architectural elements.
- Voronoi and Delaunay: Explore Voronoi and Delaunay patterns. These algorithms can create mesmerizing patterns and structures, perfect for facades, jewelry, and artistic installations.
- Subdivision Surfaces: Subdivision surfaces are excellent for creating smooth, continuous forms. Grasshopper’s Catmull-Clark Subdivision component is your go-to tool for achieving organic shapes.
- Topological Optimization: Parametric design can be used for structural optimization. Algorithms can help you find the most efficient geometry for your load-bearing structures, reducing material usage while maintaining strength.
- Generative Algorithms: Dive into generative design. Let algorithms generate design options based on constraints and objectives. This approach can lead to innovative and efficient solutions that you might not have considered manually.
Now that you’re equipped to handle complex geometries, let’s turn our attention to the art of data visualization.
Data Visualization in Grasshopper
Data visualization is a powerful tool for understanding and communicating complex information in your parametric designs. Here’s how to master it:
- Graphical Representations: Use Grasshopper’s visualization components to create graphical representations of your data. Whether it’s a heat map of structural stresses or a color-coded analysis of energy usage, visualization can reveal insights that drive design decisions.
- Interactive Dashboards: Grasshopper can be used to build interactive dashboards. You can create sliders and controls that allow you to manipulate design parameters and instantly see the impact on your visualization. This real-time feedback loop is invaluable for iterative design.
- Integration with Other Tools: Grasshopper can integrate with external visualization tools like Rhino Inside Revit. This means you can create parametric designs in Grasshopper and visualize them directly within BIM software, enhancing collaboration and communication with architects and engineers.
- Data-Driven Design: Embrace data-driven design. Use data from simulations, environmental analysis, or user behavior to inform your parametric models. This approach ensures that your designs are not just aesthetically pleasing but also functional and efficient.
Now that you’ve mastered data visualization, let’s explore the practical applications of parametric design in the real world.
Parametric Design in Manufacturing and 3D Printing
Parametric design isn’t just for conceptual exploration; it’s a valuable tool in the world of manufacturing and 3D printing. Here’s how it’s making waves:
- Customized Products: With parametric design, you can create customized products at scale. Think of 3D-printed shoes tailored to an individual’s foot shape or personalized furniture that perfectly fits a specific space.
- Topology Optimization: Parametric modeling and topology optimization go hand in hand. You can use Grasshopper to optimize the structural geometry of components, reducing material waste and weight while maintaining strength.
- Generative Design for Prototyping: Generative algorithms can generate numerous design iterations, making it ideal for prototyping and testing. Engineers and designers can quickly explore various designs, accelerating the product development process.
- Automated Manufacturing: Combine parametric design with computer numerical control (CNC) machining or robotic fabrication. This allows for the automated production of complex, customized components.
- Sustainability: Parametric design can contribute to sustainability efforts by optimizing designs for minimal material usage, reducing waste, and creating efficient structures that consume fewer resources.
Supercharging Your Grasshopper Skills with Plugins and Extensions
Hey there, fellow Grasshopper designers! If you’re looking to turbocharge your parametric design game, you’re in for a treat. In this guide, we’ll take a deep dive into the world of Grasshopper plugins and extensions. We’ll explore some popular ones, show you how to install and use them, and even discuss how you can expand Grasshopper’s capabilities with custom plugins. So, let’s get started on this exciting journey!
Exploring Popular Grasshopper Plugins
Grasshopper’s strength lies in its extensibility. Thanks to a vibrant community of developers, a plethora of plugins have been created to expand its capabilities. Let’s explore some of the most popular ones:
1. Kangaroo
Kangaroo is like a playground for physics-based simulations within Grasshopper. It allows you to simulate and model various physical phenomena such as structural behavior, form-finding, and even cloth simulations. With Kangaroo, you can create dynamic, responsive designs that adapt to real-world forces.
2. Weaverbird
Weaverbird is your go-to plugin for mesh operations. It offers a wide range of tools for manipulating and refining mesh geometry, making it perfect for complex architectural and organic designs. Whether you’re smoothing, subdividing, or optimizing mesh structures, Weaverbird has you covered.
3. Ladybug Tools
Ladybug Tools is a set of environmental analysis plugins for Grasshopper. It’s a must-have for architects and designers interested in sustainable and energy-efficient design. With Ladybug, you can perform climate analysis, daylight simulation, and energy modeling, helping you make informed design decisions.
4. Pufferfish
Pufferfish is all about pushing the boundaries of parametric design. It offers a wide array of components that enhance Grasshopper’s functionality. From advanced mathematical operations to intricate data management, Pufferfish can help you take your parametric designs to the next level.
These are just a handful of the plugins available. Depending on your design needs, you can explore and integrate many more to streamline your workflow and achieve your creative goals.
Installation and Usage of Grasshopper Plugins
Now that you’re excited about these plugins, let’s talk about how to bring them into your Grasshopper ecosystem.
Installation Steps:
- Download the Plugin: Visit the plugin’s official website or download it from Grasshopper’s food4Rhino platform.
- Locate the .gha File: The downloaded file is usually in .gha format, which is the Grasshopper assembly file.
- Drag and Drop: Open Grasshopper and simply drag the .gha file onto the canvas. Grasshopper will recognize it as a plugin and install it.
- Restart Rhino: Close and reopen Rhino to ensure that the plugin is properly loaded.
Using the Plugin:
- Accessing Components: After installation, you’ll find the plugin’s components in Grasshopper’s component palette. They are often categorized under the plugin’s name.
- Connecting Components: Use the plugin’s components just like you would with Grasshopper’s native components. Connect them with wires to build your parametric designs.
- Parameters and Settings: Each plugin may have specific parameters and settings that you can adjust to fine-tune its behavior. Be sure to consult the plugin’s documentation or online resources for guidance.
- Tutorials and Documentation: Most popular plugins have comprehensive tutorials and documentation to help you get started. Take advantage of these resources to master the plugin’s features.
Expanding Grasshopper’s Capabilities with Custom Plugins
While Grasshopper offers a vast library of plugins, there might be times when you need a custom solution tailored to your specific design needs. That’s where custom plugins come in.
Why Create Custom Plugins?
- Unique Design Challenges: Custom plugins allow you to address unique design challenges that off-the-shelf plugins may not cover.
- Workflow Optimization: You can streamline your workflow by automating repetitive tasks or creating components that cater to your specific design process.
- Integrating External Data: Custom plugins can integrate with external data sources, APIs, or even other software, expanding your design possibilities.
How to Create Custom Plugins:
- Learn a Programming Language: Most Grasshopper plugins are created using C# or Python. Learning one of these languages is your first step.
- Grasshopper Developer Mode: Enable Grasshopper’s developer mode to access advanced scripting capabilities.
- Plugin Development Environment: Use development environments like Visual Studio or Grasshopper’s scripting editor to write your custom plugins.
- Access Grasshopper API: Familiarize yourself with Grasshopper’s API (Application Programming Interface) to interact with Grasshopper components and data.
- Testing and Debugging: Thoroughly test and debug your custom plugin to ensure it works as intended.
- Documentation: Create documentation for your custom plugin so that you can refer to it later and share it with others if needed.
- Community and Resources: Join the Grasshopper developer community to seek advice, share your creations, and learn from others’ experiences.
Creating custom plugins can be a steep learning curve, but it opens up a world of possibilities for your parametric designs.

Take This Awesome Grasshopper Course IF You Want to be a MASTER!
Grasshopper’s Versatility: Powering Design in Diverse Industries
Hello, fellow Grasshopper designers! If you’ve ever wondered about the incredible versatility of Grasshopper in various industries, you’re in for a treat. In this guide, we’ll explore how Grasshopper is leaving its mark in architecture and construction, automotive and aerospace engineering, product design and manufacturing, art, and sculpture, as well as urban planning and landscape architecture. Let’s dive in and discover how Grasshopper is transforming these fields.
Grasshopper in Architecture and Construction
Architects and builders have found a creative ally in Grasshopper. Here’s how it’s shaping the world of architecture and construction:
- Parametric Facades: Grasshopper is a game-changer when it comes to designing parametric facades. It allows architects to create dynamic building skins that adapt to environmental factors, optimizing both aesthetics and energy efficiency.
- Structural Optimization: Grasshopper’s parametric capabilities are used to optimize structural designs. Engineers can simulate various load conditions and iteratively refine the structural geometry, reducing material usage and construction costs.
- Generative Design: Architects use generative algorithms in Grasshopper to explore countless design possibilities. By defining design goals and constraints, Grasshopper generates innovative architectural solutions that might not have been considered otherwise.
- Responsive Environments: Grasshopper’s real-time feedback enables the creation of responsive environments. For example, buildings can adjust shading systems or lighting conditions based on user preferences or changing weather conditions.
- Digital Fabrication: Grasshopper seamlessly integrates with digital fabrication processes. Architects can use parametric models to drive CNC machines, 3D printers, and robotic construction methods, streamlining the fabrication of complex architectural components.
Grasshopper in Automotive and Aerospace Engineering
In the world of automotive and aerospace engineering, precision and innovation are key. Grasshopper steps up to the challenge:
- Aerodynamic Optimization: Grasshopper is used to optimize vehicle and aircraft designs for aerodynamic efficiency. Engineers can simulate airflow over complex surfaces and iteratively refine designs to reduce drag and improve fuel efficiency.
- Lightweight Structures: Grasshopper’s parametric modeling capabilities are harnessed to design lightweight yet strong structures. In aerospace, this translates to reduced weight and increased payload capacity, while in automotive, it means improved fuel efficiency and performance.
- Crash Simulation: Grasshopper’s real-time simulations are invaluable for crash testing and safety analysis. Engineers can model and analyze how different design iterations perform under crash conditions, leading to safer vehicle designs.
- Customized Interiors: Grasshopper is used to create customized interiors for both cars and aircraft. It enables designers to tailor seating arrangements, storage solutions, and cabin layouts to maximize passenger comfort and utility.
- Prototyping and Rapid Iteration: Grasshopper’s parametric design and scripting capabilities facilitate rapid prototyping. Engineers can quickly iterate through design concepts, reducing development time and costs.
Grasshopper in Product Design and Manufacturing
Product designers and manufacturers are harnessing the power of Grasshopper for creativity and efficiency:
- Customized Products: Grasshopper enables the creation of customized products at scale. From personalized furniture and 3D-printed orthopedic implants to tailored consumer electronics, the parametric design ensures that products meet individual needs.
- Complex Geometry: Product designers leverage Grasshopper for complex geometries. Whether it’s intricate jewelry, ergonomic product shapes, or aesthetically pleasing consumer goods, Grasshopper’s modeling capabilities are invaluable.
- Prototyping and Testing: Rapid prototyping is made easier with Grasshopper. Designers can 3D-print prototypes of their products, allowing for physical testing and user feedback before mass production.
- Material Efficiency: Grasshopper’s parametric design can optimize product structures for material efficiency. This is especially important in industries like packaging and consumer goods, where reducing material usage has environmental and cost benefits.
- Custom Tooling: In manufacturing, Grasshopper is used to design custom tooling and fixtures. It ensures that manufacturing processes are efficient, precise, and tailored to the specific product being produced.
Grasshopper in Art and Sculpture
Artists and sculptors are pushing the boundaries of creativity with Grasshopper:
- Kinetic Art: Grasshopper is a go-to tool for creating kinetic art installations. Artists can model and simulate moving parts, ensuring that their sculptures come to life in mesmerizing ways.
- Organic Forms: Sculptors use Grasshopper to design and fabricate organic forms that would be nearly impossible to create by hand. The software’s parametric capabilities make it easy to achieve intricate, flowing shapes.
- Generative Art: Generative algorithms in Grasshopper are used to create generative art pieces. Artists define rules and parameters, and Grasshopper generates art variations, resulting in unique and visually stunning pieces.
- Interactive Installations: Grasshopper facilitates interactive art installations. Artists can use sensors and data inputs to create installations that respond to the environment or user interactions, blurring the line between art and technology.
- Digital Sculpture: Sculptors use Grasshopper for digital sculpting. It allows for precise control over form and structure, and artists can iterate on their designs digitally before creating physical sculptures.
Grasshopper in Urban Planning and Landscape Architecture
Urban planners and landscape architects are leveraging Grasshopper to shape our cities and green spaces:
- Urban Design: Grasshopper is used to model and analyze urban design proposals. It helps urban planners optimize land use, transportation networks, and public spaces for sustainability and livability.
- Parametric Landscapes: Landscape architects harness Grasshopper’s parametric capabilities to design intricate and sustainable landscapes. Whether it’s optimizing plant placement for sunlight or modeling water flow in parks, Grasshopper aids in creating functional and beautiful outdoor spaces.
- Environmental Analysis: Grasshopper integrates seamlessly with environmental analysis tools. Urban planners can use it to perform daylight analysis, wind studies, and noise simulations to inform design decisions.
- Data-Driven Planning: Grasshopper can incorporate real-time data sources, such as traffic data or weather information, to inform urban planning decisions. This data-driven approach leads to more responsive and adaptable urban designs.
- Green Infrastructure: Grasshopper supports the design of green infrastructure, including green roofs, urban forests, and sustainable drainage systems. These features enhance urban resilience and sustainability.
Navigating the Grasshopper Universe: Your Guide to Resources and Community
Grasshopper designers! If you’re on a quest to master Grasshopper and elevate your parametric design skills, you’ve come to the right place. In this guide, we’ll explore the wealth of resources and the vibrant community that can help you on your Grasshopper journey. From online tutorials and forums to books, publications, workshops, and courses, we’ve got you covered. Let’s dive in!
Online Tutorials and Learning Platforms
Grasshopper may seem like a complex beast at first, but fear not! There are plenty of online tutorials and learning platforms to guide you through the basics and beyond:
- YouTube: YouTube is a treasure trove of Grasshopper tutorials. Channels like “Parametric House,” “Designalyze,” and “ModeLab” offer video tutorials that cater to all skill levels. Whether you’re a beginner or a seasoned pro, you’ll find valuable insights and step-by-step guides.
- LinkedIn Learning (formerly Lynda.com): LinkedIn Learning offers comprehensive courses on Grasshopper. These courses cover everything from Grasshopper fundamentals to advanced topics like generative design and parametric modeling.
- Coursera: If you prefer a more structured learning experience, check out Coursera. They offer courses on computational design, parametric modeling, and Grasshopper, often in collaboration with renowned universities.
- Udemy: Udemy hosts a variety of Grasshopper courses, both free and paid. You can find courses that cater to your specific interests, whether it’s architectural design, product design, or art.
- Grasshopper3d.com: The official Grasshopper website provides a comprehensive list of tutorials and resources. You’ll find tutorials for beginners and advanced users, as well as links to external resources.
- ModeLab: ModeLab offers online workshops and tutorials focused on parametric design and Grasshopper. Their content is structured and suitable for those looking to deepen their skills.
Grasshopper Forums and Communities
Sometimes, the best way to learn and troubleshoot is by engaging with a community of fellow Grasshopper enthusiasts. Here are some places where you can connect:
- Grasshopper Forum: The official Grasshopper forum, hosted on McNeel’s website, is a goldmine of information. It’s where designers, architects, engineers, and artists gather to ask questions, share knowledge, and seek advice. Whether you have a specific problem or just want to browse for inspiration, the forum has you covered.
- Grasshopper Subreddit: Reddit’s r/grasshopper subreddit is another fantastic community. Here, you can find discussions, share your work, and get feedback from a global audience of Grasshopper enthusiasts.
- LinkedIn Groups: LinkedIn has several Grasshopper and parametric design-focused groups. Joining these groups can be a great way to network with professionals and stay updated on industry trends.
- Facebook Groups: There are numerous Grasshopper-related groups on Facebook, where you can find discussions, tutorials, and even job postings related to parametric design.
Books and Publications on Grasshopper
If you prefer to learn from books and publications, there are resources tailored to your reading preferences:
- “AAD Algorithms-Aided Design” by Arturo Tedeschi: This book delves deep into parametric design and Grasshopper. It explores generative algorithms, scripting, and their application in architecture.
- “Parametric Building Design Using Autodesk Maya” by Ming Tang: While the focus is on Maya, this book covers parametric design principles applicable to Grasshopper users interested in expanding their toolkit.
- “Grasshopper: Visual Scripting for Rhinoceros 3D” by David Bachman: This book provides a thorough introduction to Grasshopper. It’s perfect for beginners looking to build a strong foundation in parametric design.
- Academic Journals and Papers: Academic journals in the fields of architecture, engineering, and design often feature research papers and case studies that involve Grasshopper. Exploring these can offer insights into cutting-edge applications.
Grasshopper Workshops and Courses
Hands-on learning through workshops and courses can be incredibly effective. Here are some options:
- Local Workshops: Check for Grasshopper workshops or courses offered by local universities, design schools, or architectural organizations. These can provide a more interactive and immersive learning experience.
- Online Courses: Websites like Coursera, edX, and Udemy offer online Grasshopper courses that you can take at your own pace. Look for courses that align with your specific interests and skill level.
- Webinars: Keep an eye out for webinars hosted by industry experts or Grasshopper developers. These live sessions often include demonstrations and Q&A sessions, providing valuable insights.
- Professional Training: Some companies and organizations offer professional training in Grasshopper. These programs may include certification and can be particularly useful for those looking to boost their careers.
Conclusion
Congratulations, Grasshopper designers! You’ve embarked on a journey through the fascinating world of parametric design, armed with the incredible tool known as Grasshopper. As we wrap up this guide, let’s take a moment to recap the key points, explore the limitless possibilities of Grasshopper in Rhino, discuss how parametric design encourages creativity and innovation, and offer some final thoughts to inspire you on your continued Grasshopper adventures.
Recap of Key Points
Throughout this guide, we’ve covered a vast landscape of topics related to Grasshopper, from its basics to advanced techniques, and its applications across various industries. Here’s a quick recap of the key takeaways:
- Getting Started: Grasshopper is a powerful visual programming language and plugin for Rhino 3D, enabling parametric design.
- Advanced Techniques: You’ve learned about custom components, scripting, complex geometries, data visualization, and more, taking your Grasshopper skills to the next level.
- Parametric Modeling: Parametric design is all about creating designs that respond dynamically to changes in parameters, offering flexibility and innovation.
- Grasshopper in Different Industries: Grasshopper is making waves in architecture, automotive, product design, art, urban planning, and more, shaping the future of design.
- Resources and Community: We’ve explored the plethora of resources and communities available to Grasshopper designers, from tutorials and forums to books, publications, workshops, and courses.
The Limitless Possibilities of Grasshopper in Rhino
Grasshopper is more than just a plugin; it’s a gateway to a universe of design possibilities. It empowers you to break free from the limitations of traditional design methods and explore uncharted territories. With Grasshopper in Rhino, you can:
- Design Beyond Boundaries: Grasshopper allows you to push the boundaries of what’s possible in design. You can create forms that were once considered too complex or impractical.
- Optimize Everything: Grasshopper’s parametric capabilities enable you to optimize designs for efficiency, sustainability, and performance. Whether it’s minimizing material usage or maximizing energy efficiency, Grasshopper can help.
- Adapt in Real-Time: With Grasshopper, your designs become dynamic and adaptable. They can respond to changing conditions, user preferences, or external data inputs, making your creations more interactive and functional.
- Unlock Your Creativity: Grasshopper liberates your creativity. It lets you experiment, iterate, and explore design alternatives effortlessly, opening doors to innovation you might never have imagined.
Encouraging Creativity and Innovation through Parametric Design
Parametric design isn’t just a set of tools; it’s a mindset that encourages creativity and innovation. Here’s how Grasshopper and parametric design foster these qualities:
- Iterative Exploration: Parametric design allows you to explore numerous iterations quickly. This iterative process often leads to unexpected, innovative solutions.
- Data-Driven Insights: Parametric design can integrate data from various sources, providing insights that drive design decisions. This data-driven approach ensures that designs are not just aesthetically pleasing but also functional and efficient.
- Generative Algorithms: The use of generative algorithms can lead to designs that emerge from rules and constraints, sparking new and unconventional ideas.
- Cross-Disciplinary Collaboration: Parametric design encourages collaboration across disciplines. Architects, engineers, artists, and designers can work together, bringing diverse perspectives to the design process and fostering innovation.
- Sustainable Design: Parametric design is often associated with sustainability. It enables the creation of designs that are more resource-efficient, reducing waste and environmental impact.
Final Thoughts and Encouragement for Readers to Explore Grasshopper
As we wrap up this guide, we want to leave you with some final thoughts and encouragement. Grasshopper is not just a tool; it’s a gateway to a world of creativity and innovation. It’s a platform that allows you to bring your wildest design dreams to life. So, here are some parting words of wisdom:
- Keep Exploring: The world of parametric design is vast and ever-evolving. Keep exploring new techniques, tools, and resources to expand your knowledge and skills.
- Collaborate and Share: Don’t hesitate to collaborate with others and share your knowledge. The Grasshopper community is incredibly supportive, and by sharing your insights, you’ll contribute to its growth.
- Embrace Challenges: Parametric design can be challenging, but it’s in overcoming challenges that you’ll make your greatest discoveries. Don’t be afraid to tackle complex problems; they often lead to the most rewarding solutions.
- Stay Curious: Curiosity is the driving force behind innovation. Stay curious, ask questions, and be open to new ideas and approaches.
- Be Patient: Learning Grasshopper takes time and patience. Don’t be discouraged by initial setbacks; every mistake is an opportunity to learn.
- Inspire and Be Inspired: Seek inspiration in the work of others and inspire those who are just starting their Grasshopper journey. It’s a cycle of creativity that benefits everyone.
In conclusion, Grasshopper is your passport to a world where imagination knows no bounds. It’s a tool that empowers you to transform your design visions into reality. So, go forth, design boldly, innovate fearlessly, and continue to explore the limitless possibilities that Grasshopper offers. Happy designing!